macOS5-minute setupSigned & notarised

Install Answer Buddy on macOS

Six steps, five minutes. Download the .dmg, drag to Applications, grant two permissions, paste your license key — you’re ready for your interview.

Get a license key
1Step 1

Download the .dmg

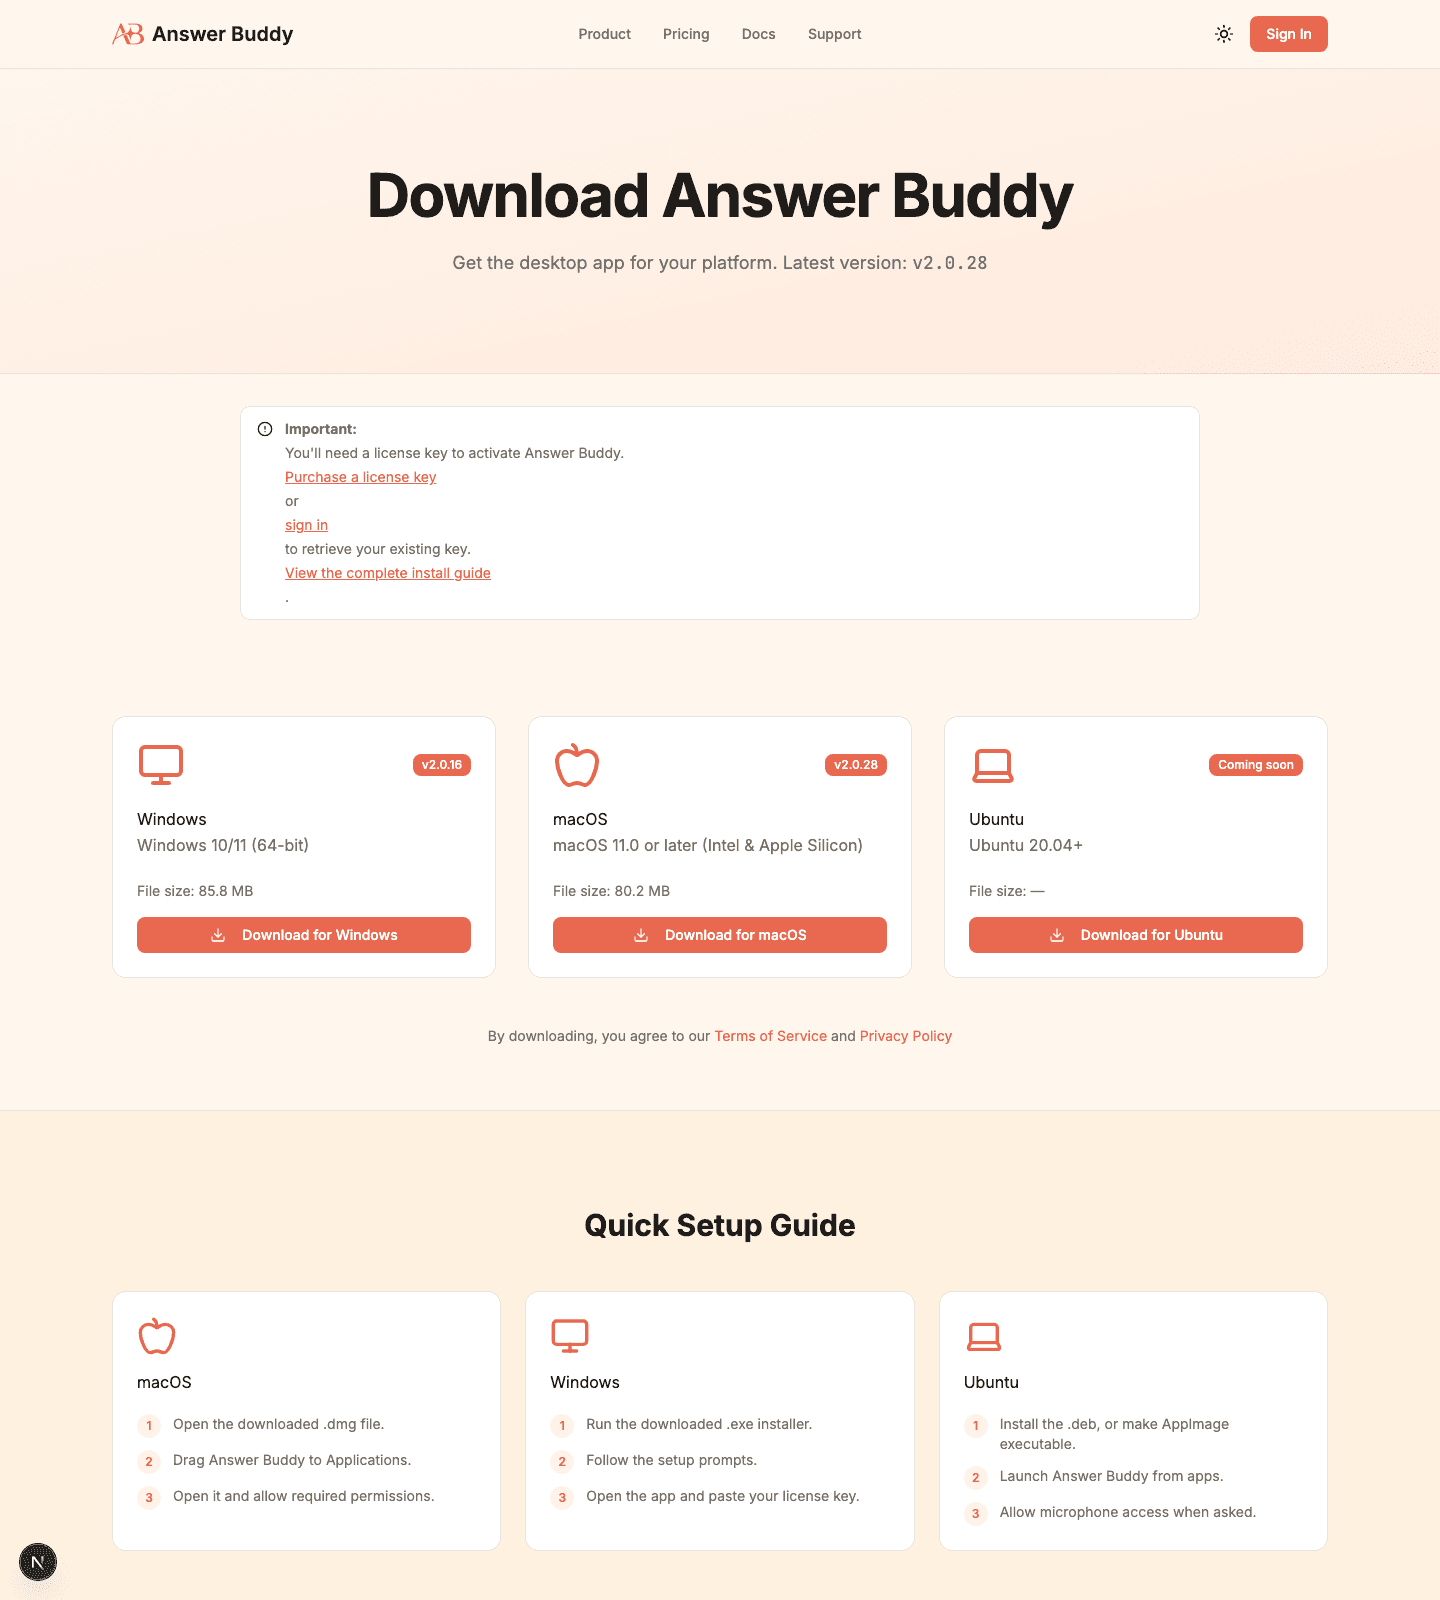
Open the Download page and click Download for macOS. The installer is a universal binary, ~85 MB, signed and notarised by Apple.

  • File is AnswerBuddy.dmg.
  • Works on Intel and Apple Silicon (M1, M2, M3, M4).
  • macOS 11 Big Sur or later required.
Answer Buddy download page with macOS option highlighted.
Download the .dmg
2Step 2

Install + first open

Double-click the .dmg, drag Answer Buddy into Applications, then open it. Gatekeeper may prompt you on first launch.

  • Drag Answer Buddy.app into Applications.
  • Open Applications, double-click Answer Buddy.
  • If macOS blocks it: Control-click the app, choose Open, confirm.

No screenshot for this step — it happens in macOS Finder / System Settings. Follow the checklist on the left.

3Step 3

Grant permissions (one-time)

macOS asks for two permissions on first launch. Both are required for the overlay to work.

  • Microphone — for live transcription.
  • Screen Recording — so the overlay can be excluded from screen-share.
  • Quit and reopen Answer Buddy after granting — permissions only apply on next launch.

No screenshot for this step — it happens in macOS Finder / System Settings. Follow the checklist on the left.

4Step 4

Activate your license

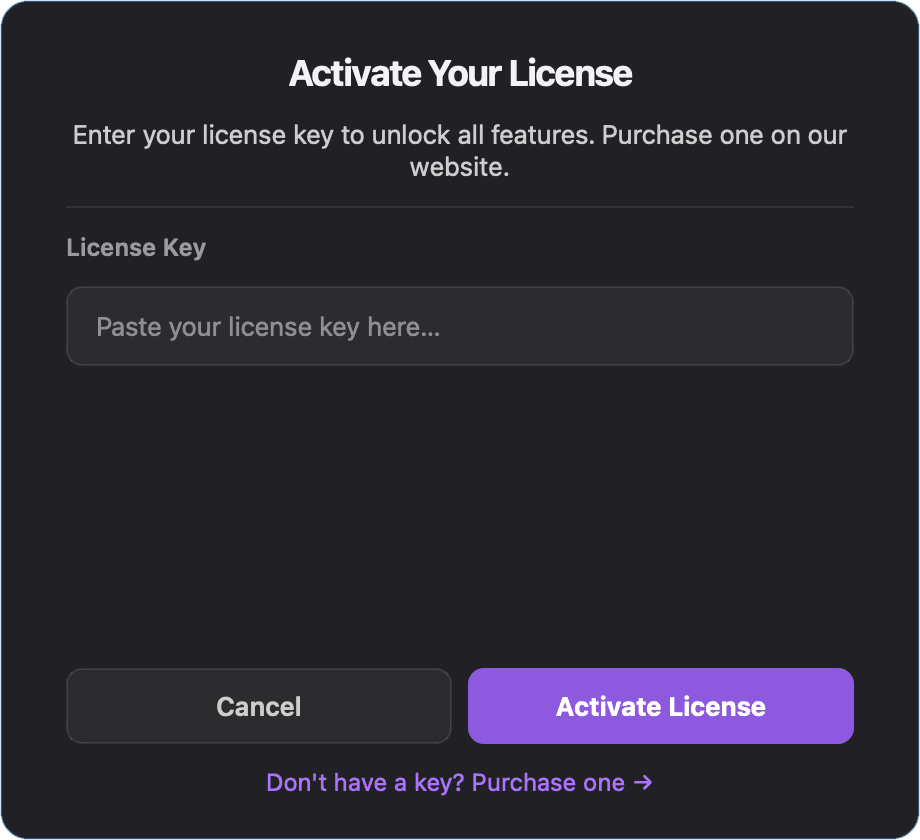
Paste the license key you got from the website. It is stored encrypted in macOS Keychain — you only enter it once per device.

  • Copy the key from your dashboard or email.
  • Paste into the activation dialog.
  • Click Activate License.
Answer Buddy license activation dialog.
Activate your license
5Step 5

Read the quick-start tour

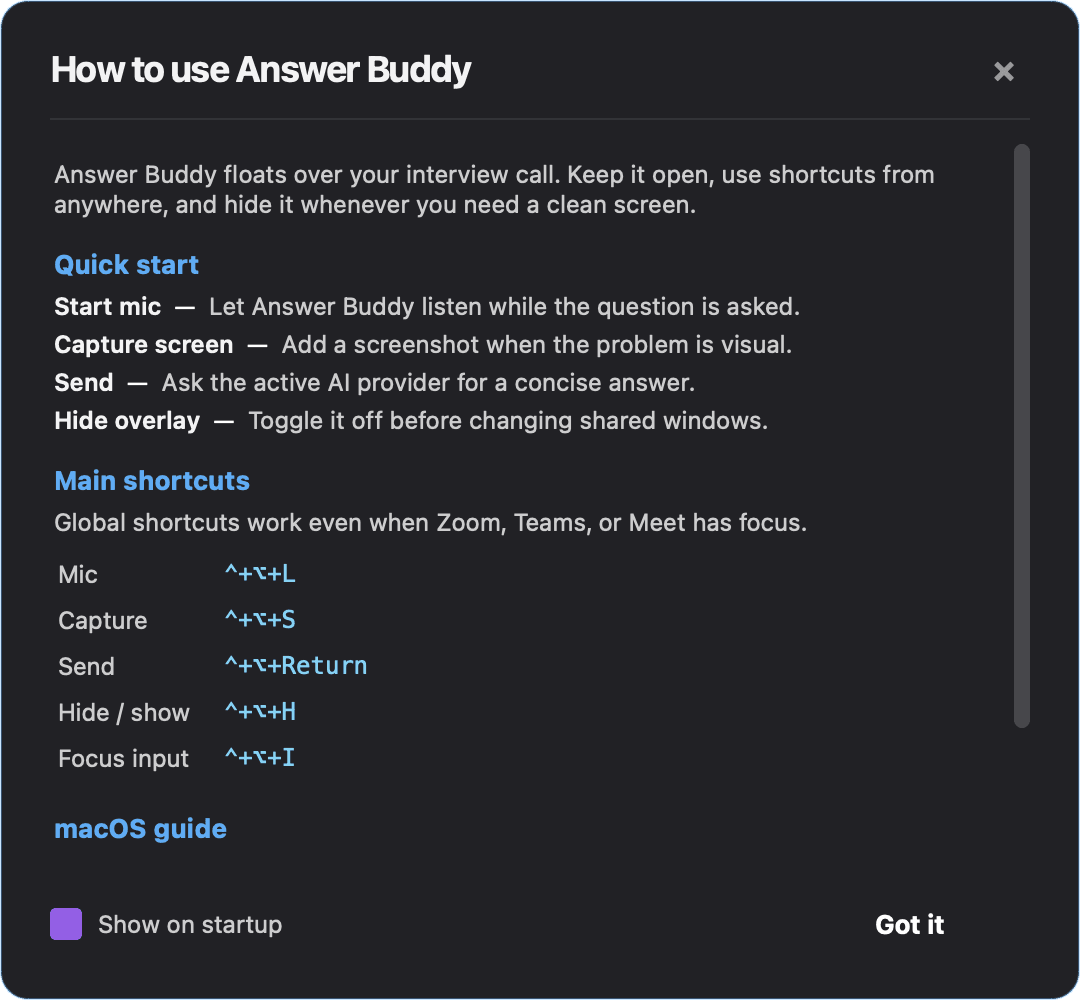
A one-page card shows the five shortcuts you actually need. 30 seconds to read, saves you fishing through menus mid-interview.

  • Open with ⌘+⌥+L — toggle the mic.
  • Send with ⌘+⌥+Return.
  • Hide (panic) with ⌘+⌥+H.
Answer Buddy quick-start dialog with shortcuts.
Read the quick-start tour
6Step 6

Start a session, ask anything

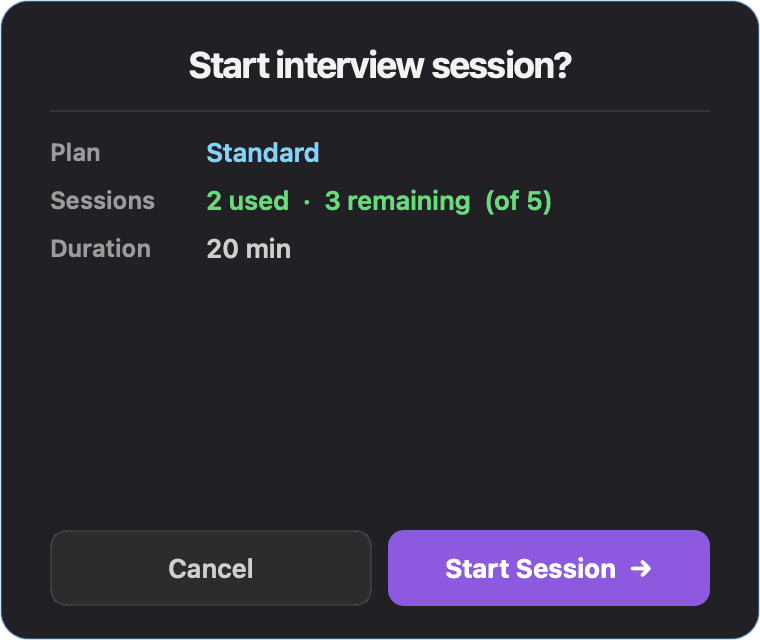
Click Start Session to begin the timer. The overlay floats above every app, invisible on screen-share, and answers come back in under a second.

  • Confirm sessions remaining before starting.
  • Type or speak the question.
  • Press ⌘+⌥+Return for a structured answer.
Start session confirmation dialog.
Start a session, ask anything

What it looks like in use

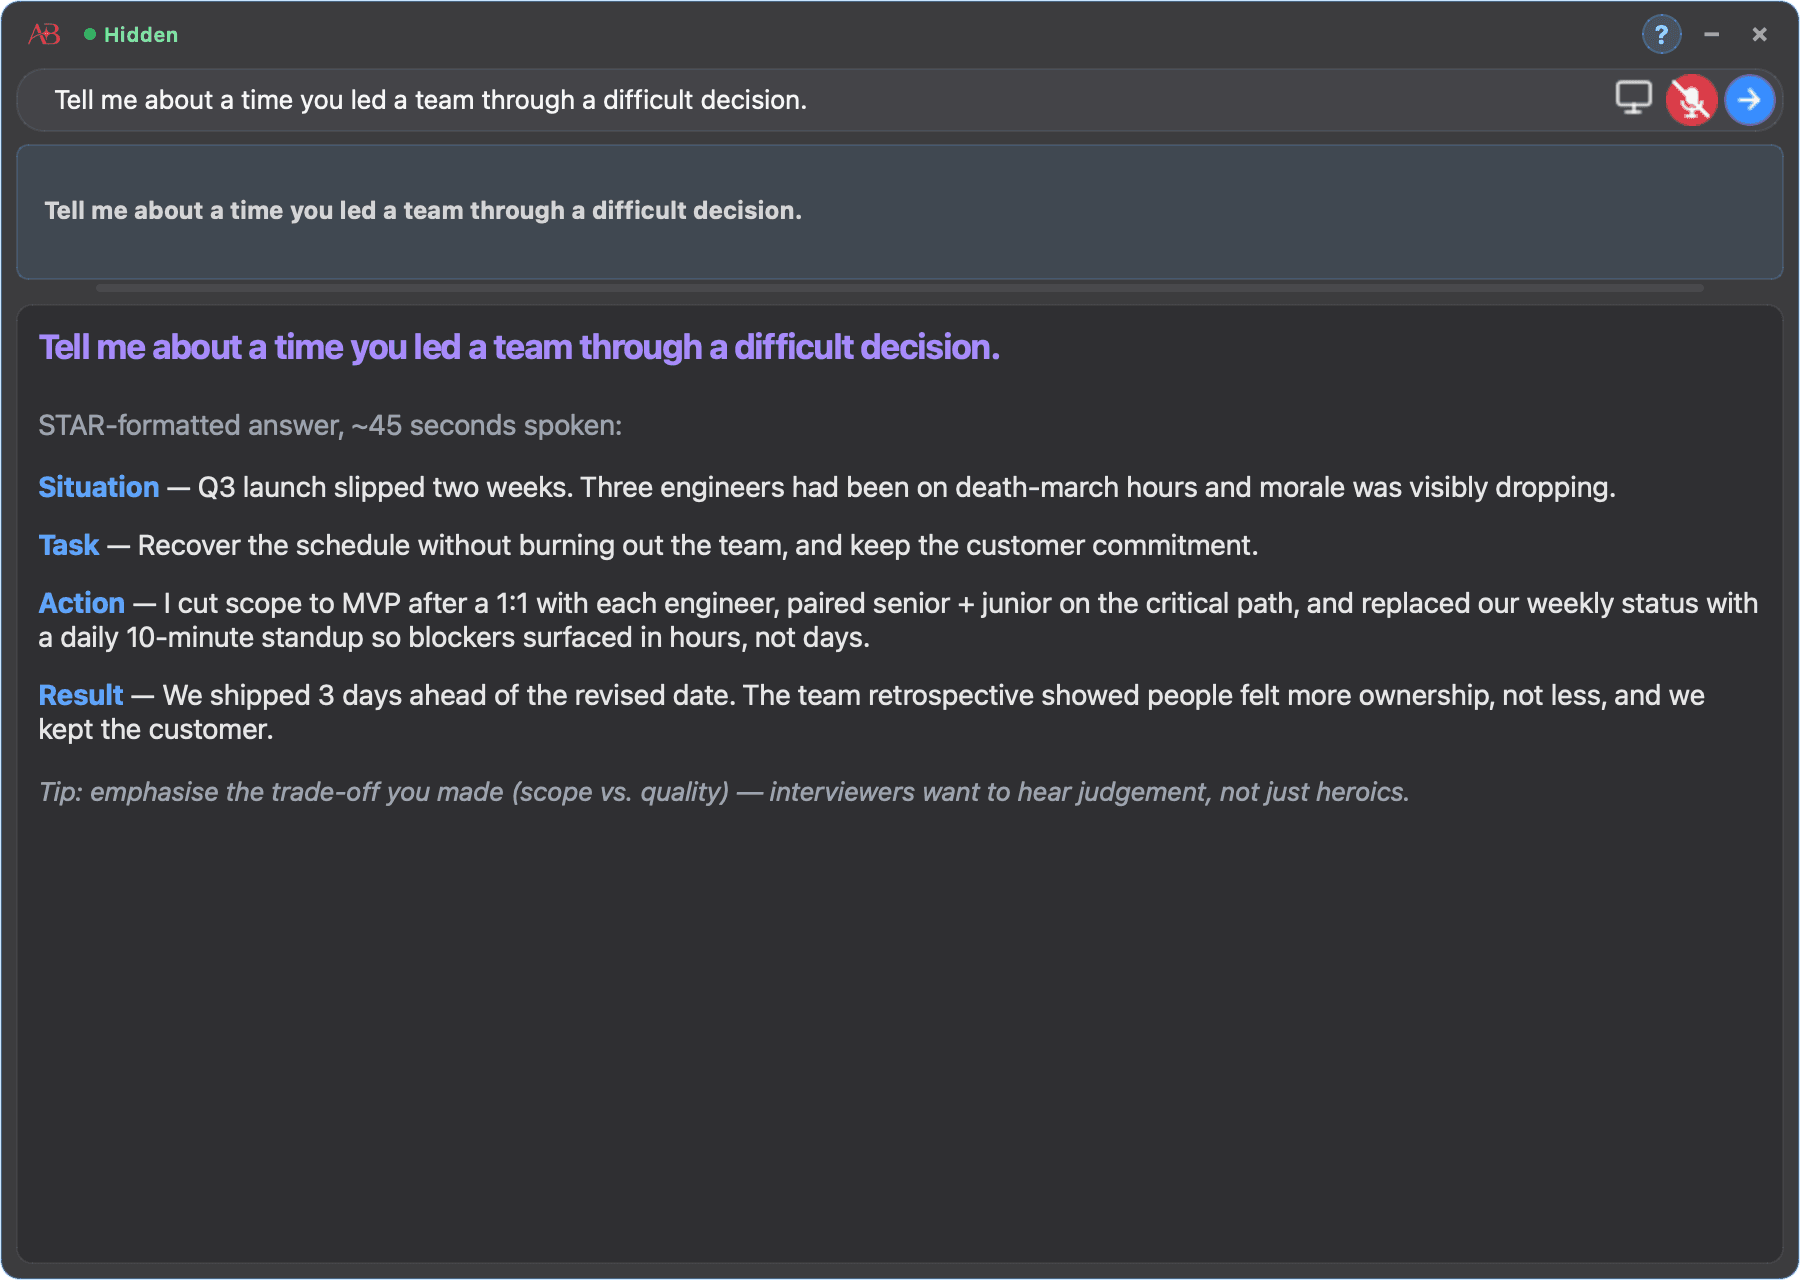
The overlay sits on top of Zoom, Meet, or Teams. You see it. Screen-share doesn’t.

Answer Buddy overlay showing a STAR-formatted answer to a behavioural interview question.
Behavioural interview question answered in STAR format. The overlay never appears in the shared screen.

Troubleshooting

The four things that occasionally trip people up on macOS.

macOS says “Answer Buddy is damaged and can’t be opened.”

Open System Settings → Privacy & Security, scroll down, click Open Anyway next to the Answer Buddy blocked line. One-time only.

Overlay shows up in my Zoom recording.

Screen Recording permission isn’t granted. Open System Settings → Privacy & Security → Screen Recording, toggle Answer Buddy on, then quit and relaunch the app.

Microphone is on but transcription stays empty.

Check System Settings → Sound → Input is set to the right device, then restart Answer Buddy. A stale WebSocket sometimes needs a clean reconnect.

Activation fails with “invalid license.”

Remove any leading or trailing spaces from the paste. Keys start with ab_live_ (paid) or ab_trial_ (free trial).

Still stuck?

We answer support emails within a few hours.